Showing posts with label Halloween Pumpkin Painting. Show all posts

Tuesday

5 Steps to Carving Your First Halloween Pumpkin

So you’re ready to carve your first Halloween pumpkin? Congratulations in joining the ranks of many who rank pumpkin carving as one of their favorite Halloween activities.

To avoid a huge mess you’ll have to clean up later, the first thing you’ll need to do is prepare your workspace.

Choosing Your Pumpkin Carving Space
Select a flat work area. Lay down several layers of newspaper being sure to overlap them.

Gather Your Supplies
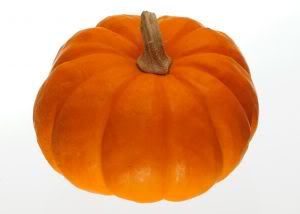
Pumpkin
Pumpkin Carving Kit or Butcher Knife & Serrated Paring Knife
Semi-Permanent Marker or Pencil
Container lined with a garbage bag to deposit your waste
Lighting Source of Your Choice (Candle, glow sticks, etc.)
Step 1:  Preparing Your Pumpkin for Carving
Turn your pumpkin on its side. Using your permanent marker, draw a large circle on the bottom of the pumpkin. Be sure it’s large enough to fit a large spoon and your hand inside. By cutting out the bottom (instead of the top) you’ll make it easier to place your light source in it. Using your large butcher knife carefully cut out the circle. Make note of the best side for carving your chosen design or face.

Step 2:  Let the Fun Begin
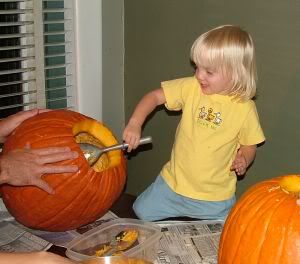
It’s time to clean out your pumpkin. Using your hands, scoop out the seeds and put them in the garbage bag, unless you want to put them in a bowl for later roasting. Using either a wooden spatula or serving spoon, scrape out the meat. Hopefully you have already decided on which side you will be carving the face, as this will need extra removal of the flesh.

Step 3:  Draw Your Design
After the pumpkin has been cleaned out, it is time to draw the design of your choice. Use a semi-permanent marker or a pencil and draw your design on the pumpkin.
If you don’t have an artistic mind it’s ok. You can use a stencil available on several Internet sites or one that may have came in your tool kit. (http://www.hersheys.com is a good site for designs.) Take a copy of the design and place it over the pumpkin. Secure this with masking tape. With a needle, push pin or nail, start poking small holes through the paper and into the pumpkin. Make sure you do them close enough as this is the pattern from which you will carve.

Step 4:  It’s Finally Time to Carve
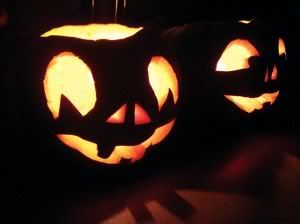
Preparation pays off. Now, let’s get carving this pumpkin. Be particular in your carving as any little slip with the knife is likely to ruin your design and may cause injury. With your paring knife or other preferred choice of carving tool, carve along the pattern lines cutting all the way through the rind. Cut away from yourself and into the pumpkin. After each feature has been cut out slowly push out the cut pieces from inside the pumpkin.
Hint: Keep your blades as sharp as possible to ensure accuracy and ease of carving.

Step 5:  Clean Up
Take your newspaper and fold it over on all sides, keeping your pumpkin “gunk” on the inside. Once folded, throw it in the trash can or garbage bag.
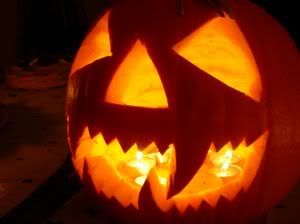
Congratulations! You’ve now carved your first pumpkin.
Once you’ve finished and cleaned up the mess, place that baby out on the front porch and add your lighting. Show it off for the entire neighborhood to see. Don’t forget to take a picture too – after all you only have a first carved pumpkin once. Enjoy!

Recommended Product:
(affiliate link)

Enhanced by Zemanta

Thursday

Halloween Group Activities - Part 2


Whether it’s a class party, Girl Scout meeting, youth group gathering or just with friends, finding activities that will engage the entire group without long wait times can be a challenge.

Try some of these activities at your next group Halloween celebration.

Crafts

Pumpkin Painting –
By using the tiny, little mini-pumpkins (gourds), newspaper and a little craft paint, kids can create their own Halloween masterpiece.

Cover the table with newspaper. Wash and dry each mini-pumpkin. Using a marker or pen, have each child draw a simple face or design on the pumpkin (or use a stencil or pumpkin painting pattern).

With small paintbrushes, the child can then paint their pumpkin design. After allowing the pumpkins to dry, a light coating of spray sealer will seal the design and keep the paint from peeling off.

Face Painting –
Face Painting is always a big hit with children of all ages. And it’s not as difficult as it sounds. You don’t have to be an artist to face paint.

There are two ways to conduct a face painting activity at a youth gathering. One is to have an adult who is prepared with a few popular face painting designs to paint a unique design on each child.

The other way is to allow the children to paint each other. There is no telling what kinds of creations kids will come up with when they are given a paintbrush and face paints.

The key with Face Painting is to use the authentic face paints. Do not attempt to use craft paints as face paints. It’s not safe for use on skin.

Popular Halloween cheek art designs include pumpkins (obviously!), ghosts, candy corn, goblins, cats and witches.

Quiet Activities

Sometimes during a Halloween party with large groups, it is necessary for the children to do an activity that requires them to be seated and relatively quiet.

Some simple ideas for the children to do while the snacks are being prepared, for example, include Halloween crossword puzzles, Halloween seek-and-finds or Halloween word maker (writing as many words as you can using the letters in “Halloween” or “Jack-O-Lantern”).

Movement

One of the most fun activities that a group can participate in at a Halloween party is Freeze Dancing. An adult operates a portable CD player containing a Halloween song CD. The children dance to the music until the music stops. At that point, each child has to freeze in the position they were in when the music stopped. Anyone who moves even a little is eliminated from the next round. The last child standing wins.

Using these ideas for Group Halloween Parties, your party is sure to be a success.

Wednesday

Pumpkin Painting: A Halloween Activity For The Whole Family


by Pumpkin Painting
 
A carved jack-o-lantern may very well be the most recognized symbol for the Halloween holiday. But using a sharp knife to carve them is not exactly an activity that everyone, especially the children who are so in love with Halloween, can do.

During a field trip to a pumpkin farm, I discovered a Halloween activity that even the youngest members of the family can participate in.

Pumpkin painting is a fun and safe way to celebrate autumn and Halloween. With just a few supplies: paint, brushes, sealer and your imagination, anyone can transform a plain pumpkin into a whimsical, life-like character.

By tracing a pattern onto the pumpkin, young children can “paint by numbers” and create their own Halloween masterpiece.

The best feature of painted pumpkins is their lifespan. A pumpkin, once carved, will last three to five days at the most before it begins to collapse and rot.

A painted pumpkin, when finished properly, will last four weeks or longer!

And a great way to make your pumpkin work double duty is to paint one side for Halloween. When Halloween is over, turn the pumpkin around, paint some autumn leaves and leave it on your porch for a beautiful Thanksgiving decoration!

JoAnne Westcott is the publisher of the full-color, step-by-step instructional e-guide:
Pumpkin Painting, Anyone Can Do It. Really!

Article Source: http://www.freeaffiliatearticles.com/directory
Related Posts with Thumbnails