Showing posts with label Halloween 2009. Show all posts
Showing posts with label Halloween 2009. Show all posts
Saturday
Tuesday
Wrapped Up Mummy Dip Recipe
This fun loving mummy makes a great centerpiece for your Halloween table. Any type of ranch dip mix can be used such as regular or fiesta.
Ingredients:
1 (1 lb.) loaf of frozen bread dough, thawed
3 pieces of string cheese
1 (16 oz.) container of sour cream
1 envelope of ranch dip mix
1 black olive
Directions:
 Preheat the oven temperature to 350 degrees.
Allow the dough to rise according the directions on the package. When the dough is ready, roll it out on a flat surface to form a 12 inch oval with the bottom narrower than the top.Make an indention on both sides 1 inch from the top of the dough oval to form the mummies head.Spray a baking sheet with a non stick cooking spray and lay the form dough onto the sheet. Allow the dough to rise 20 minutes in a warm area.
When the dough is ready bake for 22 minutes or until it turns a golden brown.
Lay strips of the string cheese over the bread from the top to the bottom. Return the bread to the oven for 2 minutes or until the cheese has melted. Remove the dough to a wire rack to cool.
Place the sour cream into a mixing bowl. Fold in the ranch dip mix until blended in well. Refrigerate until ready to serve.
When the dough has cooled cut it in half horizontally. Remove the bread in the middle leaving a 3/4 inch shell. Place the bottom half of the bread onto a serving plate. Fill the bottom half with the prepared dip.
Replace the top of the bread. Cut two slices from the olive and place on the head of the mummy for eyes.
Cut the removed bread into cubes and serve with the dip along with fresh vegetables or crackers.
Makes 16 servings
Preparation Time: approximately 25 minutes + rising
Baking Time: approximately 22 minutes + cooling
Total Time: approximately 47 minutes
Recommended:
New! Halloween Recipes Ebook. Over 50 Recipes With Photos.
Plus 3 Bonus Ebooks - Halloween Crafts, Halloween Drawing and Halloween Printable Games!
(affiliate link)
Ingredients:
1 (1 lb.) loaf of frozen bread dough, thawed
3 pieces of string cheese
1 (16 oz.) container of sour cream
1 envelope of ranch dip mix
1 black olive
Directions:
Preheat the oven temperature to 350 degrees.Allow the dough to rise according the directions on the package. When the dough is ready, roll it out on a flat surface to form a 12 inch oval with the bottom narrower than the top.Make an indention on both sides 1 inch from the top of the dough oval to form the mummies head.Spray a baking sheet with a non stick cooking spray and lay the form dough onto the sheet. Allow the dough to rise 20 minutes in a warm area.
When the dough is ready bake for 22 minutes or until it turns a golden brown.
Lay strips of the string cheese over the bread from the top to the bottom. Return the bread to the oven for 2 minutes or until the cheese has melted. Remove the dough to a wire rack to cool.
Place the sour cream into a mixing bowl. Fold in the ranch dip mix until blended in well. Refrigerate until ready to serve.
When the dough has cooled cut it in half horizontally. Remove the bread in the middle leaving a 3/4 inch shell. Place the bottom half of the bread onto a serving plate. Fill the bottom half with the prepared dip.
Replace the top of the bread. Cut two slices from the olive and place on the head of the mummy for eyes.
Cut the removed bread into cubes and serve with the dip along with fresh vegetables or crackers.
Makes 16 servings
Preparation Time: approximately 25 minutes + rising
Baking Time: approximately 22 minutes + cooling
Total Time: approximately 47 minutes
Recommended:
New! Halloween Recipes Ebook. Over 50 Recipes With Photos.
Plus 3 Bonus Ebooks - Halloween Crafts, Halloween Drawing and Halloween Printable Games!
(affiliate link)
Sunday
Easy Additions for Perfect Halloween Meals
It’s Halloween! With just a few little changes or additions to things that you probably already make, you can put the spirit of Halloween on your table.
Scary Eyeballs – Add a little more mustard into the centers of deviled eggs or a thin dollop under where you will lay a black olive into the creamy center.
Ghost Sandwiches – Cut your bread into ghosts, add the filling of your choice and your children will have a ghostly treat for their school or after school sandwich.
Wormy Hot Dogs – Thinly slice your hot dogs and then microwave. This will make them curl to look like worms. Put them on a hamburger bun and dress with mustard, catsup and pickles to make a slimy swamp underneath.
Ghostly Toast – Toast your bread. When it is cool enough to cut, with a gingerbread girl cutter or a plain knife, cut to make a ghost body. Top with whipped cream cheese or flavored yogurt with raisins or dates cut for eyes.
Orange Jack O Lantern – With a toothpick, gently carve a face into the orange. Careful not to injure the meat/pulp of the orange, your child will have a small version of the Jack O Lantern that is healthy and edible.
Graveyard Snack – Take a cup of plain or buttered popped popcorn; add a half cup each of mini pretzels, mini marshmallows, chocolate chips, goldfish crackers and raisins.
Spider Snack – Taking two round crackers, such as the ritz, put peanut butter in the middle. Take 8 small pretzels and stick all around, 4 on each side to make the legs. Add raisins for eyes.
Salty Bones – Making breadsticks for your spaghetti tonight? Here’s a Halloween twist. Unroll a tube of refrigerated breadstick roll and separate the triangle pieces. Stretch each individual piece to make a long bone like figure. Cut about a 1 and a half inch slit in each end with your kitchen scissors. Roll the remaining 4 flaps into what would make the end of a dog bone. Sprinkle with coarse salt and bake as directed.
Goblin Tongues – Using mini bagels, spread cream cheese or mayonnaise, your preference, onto bagel. Cut slices out of circular pieces of bologna lunch meat to look like tongues and put into the top center of the bagel, leaving it to hang out like a tongue.
These are just a small sampling of things you can do to impress the kids or grandkids. Nothing fancy, quite simple for you but they’ll love them. Presentation and excitement is part of children accepting new and different things. Let them help you when creating these treats and they may just be a little more receptive to the new Halloween changes in foods they already love.
Scary Eyeballs – Add a little more mustard into the centers of deviled eggs or a thin dollop under where you will lay a black olive into the creamy center.
Ghost Sandwiches – Cut your bread into ghosts, add the filling of your choice and your children will have a ghostly treat for their school or after school sandwich.Wormy Hot Dogs – Thinly slice your hot dogs and then microwave. This will make them curl to look like worms. Put them on a hamburger bun and dress with mustard, catsup and pickles to make a slimy swamp underneath.
Ghostly Toast – Toast your bread. When it is cool enough to cut, with a gingerbread girl cutter or a plain knife, cut to make a ghost body. Top with whipped cream cheese or flavored yogurt with raisins or dates cut for eyes.
Orange Jack O Lantern – With a toothpick, gently carve a face into the orange. Careful not to injure the meat/pulp of the orange, your child will have a small version of the Jack O Lantern that is healthy and edible.
Graveyard Snack – Take a cup of plain or buttered popped popcorn; add a half cup each of mini pretzels, mini marshmallows, chocolate chips, goldfish crackers and raisins.
Spider Snack – Taking two round crackers, such as the ritz, put peanut butter in the middle. Take 8 small pretzels and stick all around, 4 on each side to make the legs. Add raisins for eyes.
Salty Bones – Making breadsticks for your spaghetti tonight? Here’s a Halloween twist. Unroll a tube of refrigerated breadstick roll and separate the triangle pieces. Stretch each individual piece to make a long bone like figure. Cut about a 1 and a half inch slit in each end with your kitchen scissors. Roll the remaining 4 flaps into what would make the end of a dog bone. Sprinkle with coarse salt and bake as directed.
Goblin Tongues – Using mini bagels, spread cream cheese or mayonnaise, your preference, onto bagel. Cut slices out of circular pieces of bologna lunch meat to look like tongues and put into the top center of the bagel, leaving it to hang out like a tongue.
These are just a small sampling of things you can do to impress the kids or grandkids. Nothing fancy, quite simple for you but they’ll love them. Presentation and excitement is part of children accepting new and different things. Let them help you when creating these treats and they may just be a little more receptive to the new Halloween changes in foods they already love.
Friday
Halloween Fun for Children...Riddles, Quotes, Word Game and Poem
The time is upon us. The weather is starting to get chillier, the leaves are falling, school has started and that can only mean one thing: Halloween is around the corner! This time of year is all spooking a few friends, stocking up with goodies on the big night and having fun. So, here are some ideas to help your children (and you) have a great time this Halloween. Have fun!
Halloween Riddles for All Ages
 1. What did Dr. Spook give the witch who had a sore throat?
Answer: Coffin Drops
2. What do Ghost’s wear when their eye sight is failing?
Answer: Spookicles
3. How do you make a witch stew?
Answer: Make her wait!
4. What do lady ghosts put on their skin?
Answer: Vanishing lotion
5. What do you get when you cross a witch with an iceberg?
Answer: A cold spell
6. How do bats learn to fly?
Answer: They take batting lessons.
7. If you worked in a mortuary, what would you call your free time?
Answer: Coffin Break
8. Why do skeletons always catch a cold?
Answer: the get chilled to the bone.
9. What is a vampire's favorite fruit?
Answer: Necktarines
Tombstone Quotes to Make You Giggle
Bonnie Parker (Bonnie and Clyde): “As the flowers are all made sweeter by the sunshine and the dew, so this old world is made brighter by the lives of folks like you.”
Tombstone Arizona: “Here lies Lester Moore; Four slugs from a .44; No Les No More."
Pennsylvania Tombstone, US: “Here lies the body of Jonathan Blake. Stepped on the gas instead of the brake.”
England Tombstone: “The children of Israel wanted bread and the Lord sent them manna. Old Clerk Wallace wanted a wife…and the Devil sent him Anna.”
Massachusetts Tombstone: “Under the sod and under the trees, lies the body of Jonathan Pease. He is not here, there’s only the pod. Pease shelled out and went to God.”
Dentists’ Tombstone: “John Brown is filling his last cavity.”
Can you come up with more funny or spooky tombstone ideas?
Who Can Make the Most Words?
On a piece of paper write the words “Trick or Treat”. See who can make the most words using only the letters found in the phrase.
Possible Answers: (There may be more, but here are quite a bit to get you started): rock, ate, tick, tack, race, oat, are, rate, crate, car, rack, trace, tart, tort, crater, racer, rice, track, or, tea, tire, ace, ice, ore, tore, rico, roar, kite, tear
Here’s a Halloween poem kids will love:
Witches and Goblins and Ghosts, OH NO
By Sheilah Warner Blackledge
Out on a night called Halloween
I’m dressed like a dog and my mom’s a queen
The sounds of ghosts make me turn green
I think I’ll run, but instead I scream
The witch over there behind those trees
Put me and mama on our knees
A goblin grabbed me by the arm
It was my friend Jo who meant me no harm
Oh my, oh why do I want to go?
To hear witches and goblins and ghosts, OH NO!
Saturday
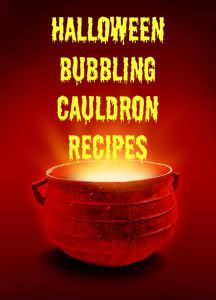
Bubbling Cauldron Recipes: Dip and Witch Brew Fit for Halloween Parties
Throwing or attending a Halloween party this year and wondering what to make? Bubbling cauldrons are the dish of choice for the ghosts and witches of the night. Here are two recipes everyone in attendance is sure to enjoy.
Goblin Dip
 Ingredients:
1 pkg (16 oz.) Velveeta processed cheese, cubed
16 oz shredded Swiss cheese
1 can(10 ½ oz.) cheddar cheese soup
2 cans (15 oz.) black beans (drain well)
1 jar medium or hot salsa
1 can (4 oz) diced jalapeno peppers, (drain well)
1 round loaf of pumpernickel or round marble rye bread, unsliced
2 loaves (18 ounces each) round marble rye bread, unsliced
Pretzel rods
Directions:
Put canned soup into saucepan. Add the processed and swiss cheese into the pan. Melt cheeses over low heat, stirring often. Remove from heat. Stir in beans, salsa and jalapeño peppers, if desired.
Carefully cut center out of bread, leaving 1-1/2-inch shell. Cut or tear bread center into pieces for dipping. Fill your emptied bread bowl (cauldron) with the cheese.
Take your cut or tore bread pieces that you took from your bowl and place on a serving plate. For an added extra touch, you could “assemble a campfire” of pretzel rods around the bowl. Put 1 full pretzel rod into the cheese dip and serve immediately.
Alternate Ideas for Goblin Dip
If you want more of a Mexican taste to your cheesy dip, add a package of taco seasoning into the saucepan when cooking and a can of Ro-tel tomatoes with green chilis.
Using Halloween cookie cutters (you can purchase them) and cocktail bread, cut out some decorative pieces of bread for dipping.
Witch’s Brew Recipe
Ingredients:
2 packages lime Jell-O
Ice (if needed)
Lime Kool-Aid
1 Gallon Green Punch Kool-Aid or Green Punch (any brand)
Cauldron or Punch Bowl
Ladle
Directions:
The night before, using the lime Kool-Aid prepare ice cubes. You’ll need to use the flavored ice cubes as this particular witch’s brew does not do well watered down with plain water ice cubes. It will water it down too much.
In enough time for the Jell-O to set before serving, prepare both packages of lime Jell-O. Place in fridge to set. Make one gallon of Green Punch Kool-Aid or you can purchase a gallon of any brand green punch. Chill.
When ready to serve, using a fork, mash up the set Jell-O into globs. Pour the punch into punch bowl or cauldron. Add Jell-O globs and Kool-Aid ice cubes.
Tips for serving: Because this is a Jell-O punch, do not use a pitcher to serve. The Jell-O will try and sit on the bottom. Make certain you stir the punch well and ladle it into your guests’ cups.
Goblin Dip
Ingredients: 1 pkg (16 oz.) Velveeta processed cheese, cubed
16 oz shredded Swiss cheese
1 can(10 ½ oz.) cheddar cheese soup
2 cans (15 oz.) black beans (drain well)
1 jar medium or hot salsa
1 can (4 oz) diced jalapeno peppers, (drain well)
1 round loaf of pumpernickel or round marble rye bread, unsliced
2 loaves (18 ounces each) round marble rye bread, unsliced
Pretzel rods
Directions:
Put canned soup into saucepan. Add the processed and swiss cheese into the pan. Melt cheeses over low heat, stirring often. Remove from heat. Stir in beans, salsa and jalapeño peppers, if desired.
Carefully cut center out of bread, leaving 1-1/2-inch shell. Cut or tear bread center into pieces for dipping. Fill your emptied bread bowl (cauldron) with the cheese.
Take your cut or tore bread pieces that you took from your bowl and place on a serving plate. For an added extra touch, you could “assemble a campfire” of pretzel rods around the bowl. Put 1 full pretzel rod into the cheese dip and serve immediately.
Alternate Ideas for Goblin Dip
If you want more of a Mexican taste to your cheesy dip, add a package of taco seasoning into the saucepan when cooking and a can of Ro-tel tomatoes with green chilis.
Using Halloween cookie cutters (you can purchase them) and cocktail bread, cut out some decorative pieces of bread for dipping.
Witch’s Brew Recipe
Ingredients:
2 packages lime Jell-O
Ice (if needed)
Lime Kool-Aid
1 Gallon Green Punch Kool-Aid or Green Punch (any brand)
Cauldron or Punch Bowl
Ladle
Directions:
The night before, using the lime Kool-Aid prepare ice cubes. You’ll need to use the flavored ice cubes as this particular witch’s brew does not do well watered down with plain water ice cubes. It will water it down too much.
In enough time for the Jell-O to set before serving, prepare both packages of lime Jell-O. Place in fridge to set. Make one gallon of Green Punch Kool-Aid or you can purchase a gallon of any brand green punch. Chill.
When ready to serve, using a fork, mash up the set Jell-O into globs. Pour the punch into punch bowl or cauldron. Add Jell-O globs and Kool-Aid ice cubes.
Tips for serving: Because this is a Jell-O punch, do not use a pitcher to serve. The Jell-O will try and sit on the bottom. Make certain you stir the punch well and ladle it into your guests’ cups.
Tuesday
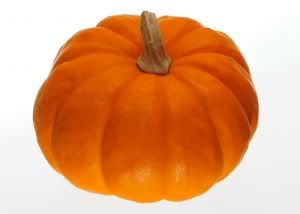
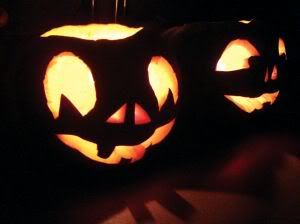
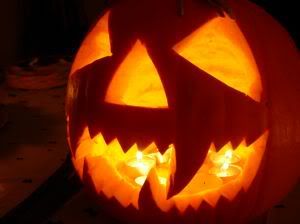
5 Steps to Carving Your First Halloween Pumpkin
So you’re ready to carve your first Halloween pumpkin? Congratulations in joining the ranks of many who rank pumpkin carving as one of their favorite Halloween activities.
To avoid a huge mess you’ll have to clean up later, the first thing you’ll need to do is prepare your workspace.
Choosing Your Pumpkin Carving Space
Select a flat work area. Lay down several layers of newspaper being sure to overlap them.
Gather Your Supplies
 Pumpkin
Pumpkin Carving Kit or Butcher Knife & Serrated Paring Knife
Semi-Permanent Marker or Pencil
Container lined with a garbage bag to deposit your waste
Lighting Source of Your Choice (Candle, glow sticks, etc.)
Step 1: Preparing Your Pumpkin for Carving
Turn your pumpkin on its side. Using your permanent marker, draw a large circle on the bottom of the pumpkin. Be sure it’s large enough to fit a large spoon and your hand inside. By cutting out the bottom (instead of the top) you’ll make it easier to place your light source in it. Using your large butcher knife carefully cut out the circle. Make note of the best side for carving your chosen design or face.
Step 2: Let the Fun Begin
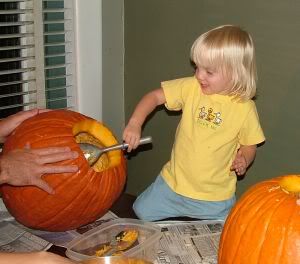 It’s time to clean out your pumpkin. Using your hands, scoop out the seeds and put them in the garbage bag, unless you want to put them in a bowl for later roasting. Using either a wooden spatula or serving spoon, scrape out the meat. Hopefully you have already decided on which side you will be carving the face, as this will need extra removal of the flesh.
Step 3: Draw Your Design
After the pumpkin has been cleaned out, it is time to draw the design of your choice. Use a semi-permanent marker or a pencil and draw your design on the pumpkin.
If you don’t have an artistic mind it’s ok. You can use a stencil available on several Internet sites or one that may have came in your tool kit. (http://www.hersheys.com is a good site for designs.) Take a copy of the design and place it over the pumpkin. Secure this with masking tape. With a needle, push pin or nail, start poking small holes through the paper and into the pumpkin. Make sure you do them close enough as this is the pattern from which you will carve.
Step 4: It’s Finally Time to Carve
 Preparation pays off. Now, let’s get carving this pumpkin. Be particular in your carving as any little slip with the knife is likely to ruin your design and may cause injury. With your paring knife or other preferred choice of carving tool, carve along the pattern lines cutting all the way through the rind. Cut away from yourself and into the pumpkin. After each feature has been cut out slowly push out the cut pieces from inside the pumpkin.
Hint: Keep your blades as sharp as possible to ensure accuracy and ease of carving.
Step 5: Clean Up
Take your newspaper and fold it over on all sides, keeping your pumpkin “gunk” on the inside. Once folded, throw it in the trash can or garbage bag.
 Congratulations! You’ve now carved your first pumpkin.
Once you’ve finished and cleaned up the mess, place that baby out on the front porch and add your lighting. Show it off for the entire neighborhood to see. Don’t forget to take a picture too – after all you only have a first carved pumpkin once. Enjoy!

To avoid a huge mess you’ll have to clean up later, the first thing you’ll need to do is prepare your workspace.
Choosing Your Pumpkin Carving Space
Select a flat work area. Lay down several layers of newspaper being sure to overlap them.
Gather Your Supplies
PumpkinPumpkin Carving Kit or Butcher Knife & Serrated Paring Knife
Semi-Permanent Marker or Pencil
Container lined with a garbage bag to deposit your waste
Lighting Source of Your Choice (Candle, glow sticks, etc.)
Step 1: Preparing Your Pumpkin for Carving
Turn your pumpkin on its side. Using your permanent marker, draw a large circle on the bottom of the pumpkin. Be sure it’s large enough to fit a large spoon and your hand inside. By cutting out the bottom (instead of the top) you’ll make it easier to place your light source in it. Using your large butcher knife carefully cut out the circle. Make note of the best side for carving your chosen design or face.
Step 2: Let the Fun Begin
It’s time to clean out your pumpkin. Using your hands, scoop out the seeds and put them in the garbage bag, unless you want to put them in a bowl for later roasting. Using either a wooden spatula or serving spoon, scrape out the meat. Hopefully you have already decided on which side you will be carving the face, as this will need extra removal of the flesh. Step 3: Draw Your Design
After the pumpkin has been cleaned out, it is time to draw the design of your choice. Use a semi-permanent marker or a pencil and draw your design on the pumpkin.
If you don’t have an artistic mind it’s ok. You can use a stencil available on several Internet sites or one that may have came in your tool kit. (http://www.hersheys.com is a good site for designs.) Take a copy of the design and place it over the pumpkin. Secure this with masking tape. With a needle, push pin or nail, start poking small holes through the paper and into the pumpkin. Make sure you do them close enough as this is the pattern from which you will carve.
Step 4: It’s Finally Time to Carve
Preparation pays off. Now, let’s get carving this pumpkin. Be particular in your carving as any little slip with the knife is likely to ruin your design and may cause injury. With your paring knife or other preferred choice of carving tool, carve along the pattern lines cutting all the way through the rind. Cut away from yourself and into the pumpkin. After each feature has been cut out slowly push out the cut pieces from inside the pumpkin. Hint: Keep your blades as sharp as possible to ensure accuracy and ease of carving.
Step 5: Clean Up
Take your newspaper and fold it over on all sides, keeping your pumpkin “gunk” on the inside. Once folded, throw it in the trash can or garbage bag.
Congratulations! You’ve now carved your first pumpkin.Once you’ve finished and cleaned up the mess, place that baby out on the front porch and add your lighting. Show it off for the entire neighborhood to see. Don’t forget to take a picture too – after all you only have a first carved pumpkin once. Enjoy!
Recommended Product:
(affiliate link)
Thursday
Halloween Dinner Recipe: Crispy Witch Fingers
These claws will really “grab” your guest’s attention. The Cajun seasoning gives these strips a bold taste while the cornflake covering helps to keep the chicken moist during baking. The Cajun seasoning can be left out if preparing these for children.
Ingredients:
1 sweet red pepper
2 T flour
2 t + 1 T Cajun seasoning, divided
3 eggs
1 1/2 C cornflake crumbs
2 T green onion, chopped
1 lb. boneless skinless chicken breast, cut into 16, 3/4 inch strips
Directions:
Set the oven temperature to 350 degrees allowing it to preheat. Lightly spray a baking sheet with a non stick cooking spray.
Cut the pepper into 16 triangles and set aside.
Place the flour and 2 t of the Cajun seasoning into a plastic zip lock bag. Close and shake the bag to combine the ingredients together well.
Place the eggs in a shallow bowl and beat lightly with a fork.
Place the cornflake crumbs in a shallow bowl.
Add the green onion and remaining Cajun seasoning to the cornflake crumbs and toss to combine. Place a few strips of chicken into the flour mixture, close and shake to lightly cover. Dip the coated strips in the egg shaking off any excess. Roll in the cornflake mixture covering the strips well and place on the baking sheet.
Repeat until all the chicken strips are covered.
Place the chicken into the oven and bake for 20 minutes or until the juices run clear. Remove and allow cooling enough to handle.
Cut a small slit into one end of each of the strips. Insert a pepper triangle; point out, into the strips.
Makes 8 servings
Preparation Time: approximately 15 minutes
Baking Time: approximately 20 minutes
Total Time: approximately 35 minutes
Saturday
7 Tips for Trick or Treating Safety
Going out into the ghoulish night to troll for candy is not as innocent as it seems. It should be, but it is not. Parents and children alike want to enjoy their bit of frightful fun without real dangers lurking around every corner. Here are some safety tips to accomplish that task.
1. Begin trick or treating during the daylight. It used to be that everyone waited until dark for greater effect. Unfortunately, there are those who want to cause trouble and can only do so after dark. Now, trick or treating begins at dusk even if the sun is not down.
2. For smaller children, drive instead of walk. The concept is the same as far as kids are concerned. Their friends will still see their costume and they still receive candy. As the night wears on it may get cold and little feet get tired quite quickly. A car means a faster exit when everyone is too tired to go on.
3. Check the candy before letting any is eaten. It is a safety precaution that protects the kids. Not everyone is out to harm children but there have been incidents in the past where blades and pins were found in candy.
4. Stick together. Never let a child go trick or treating alone. If you can’t do it, entrust your child’s care to another adult friend. Let them walk a few feet ahead to feel independent but not so far that they are out of your sight.
5. Choose costumes that fit properly. Wherever possible, use homemade costumes or non-toxic paint to replace store bought masks. Most masks are too hot and don’t provide an adequate visual field. Kids who can’t see where they are going can trip and fall.
6. Refrain from taking homemade candy and treats. Even schools don’t accept homemade food items anymore. It is too easy to get sick and the liability is high. Homemade candy apples look scrumptious, but there is no list of ingredients to tell you what was used to create them. Stick to prepackaged candy for children to eat.
7. Use a cloth shopping bag to hold the candy. Plastic bags can buckle under the weight of the haul and your child could lose their loot on the front step or in the street. Plastic pumpkins don’t hold as much candy and the strap can break with the same results as a plastic bag.
Trick or treating is a fun Halloween night tradition designed to scare us silly. In the process, don’t forget to take precautions so everyone is safe.
![Reblog this post [with Zemanta]](http://img.zemanta.com/reblog_e.png?x-id=a0b6c589-61b6-4a64-a203-838bd3d2c321)

1. Begin trick or treating during the daylight. It used to be that everyone waited until dark for greater effect. Unfortunately, there are those who want to cause trouble and can only do so after dark. Now, trick or treating begins at dusk even if the sun is not down.
2. For smaller children, drive instead of walk. The concept is the same as far as kids are concerned. Their friends will still see their costume and they still receive candy. As the night wears on it may get cold and little feet get tired quite quickly. A car means a faster exit when everyone is too tired to go on.
3. Check the candy before letting any is eaten. It is a safety precaution that protects the kids. Not everyone is out to harm children but there have been incidents in the past where blades and pins were found in candy.
4. Stick together. Never let a child go trick or treating alone. If you can’t do it, entrust your child’s care to another adult friend. Let them walk a few feet ahead to feel independent but not so far that they are out of your sight.
5. Choose costumes that fit properly. Wherever possible, use homemade costumes or non-toxic paint to replace store bought masks. Most masks are too hot and don’t provide an adequate visual field. Kids who can’t see where they are going can trip and fall.
6. Refrain from taking homemade candy and treats. Even schools don’t accept homemade food items anymore. It is too easy to get sick and the liability is high. Homemade candy apples look scrumptious, but there is no list of ingredients to tell you what was used to create them. Stick to prepackaged candy for children to eat.
7. Use a cloth shopping bag to hold the candy. Plastic bags can buckle under the weight of the haul and your child could lose their loot on the front step or in the street. Plastic pumpkins don’t hold as much candy and the strap can break with the same results as a plastic bag.
Trick or treating is a fun Halloween night tradition designed to scare us silly. In the process, don’t forget to take precautions so everyone is safe.
Thursday
Trick or Treat!
Many of us have uttered those words or ones like them since we were old enough to wear a costume. Some say cute little rhymes at each house they visit. But, what is the origin of our current candy grabbing tradition on Halloween?
Trick or treating goes back to the celebration of Samhain by the Celts on the British Isles. This pagan festival was one that celebrated nature and its gifts. The practitioners also believed that on that night the boundaries between the living and the dead were compromised and spirits could once again walk the earth.
In an effort to appease the spirits, people would leave offerings of food and drink on their doorsteps. These rituals were thought to protect their harvests for another year. This was also the time for a practice called “souling.”
Souling involved food in exchange for prayers. During the celebration, poor people would take to begging for food from neighbors. This food was granted in exchange for prayers by the receivers for the souls of dead family members.
As the tradition was passed down, the begging became food left for these poor individuals who would continue to pray for the dead. Eventually, children were sent from house to house to receive food or bits of money for the family.In some countries, the wearing of masks and receiving of gifts is still called “souling.” Small food items or money are still received by children.
Trick or treating is a thoroughly modern and American tradition.When it first started, trick or treating was just that. If a homeowner didn’t provide treats, the costumed person would perform some trick. This could be playing a prank on them or egging the house. In some countries, this is a part of the mischief of the spirits. Any spirit that didn’t receive food was also likely to do something to the person of the house.
Now, kids go from house to house, saying this phrase and receiving a ton of sweet treats. People travel from neighborhood to neighborhood for sweet fare. Tricks are more a part of the fun of the night than a slight against any one person. If a neighbor is not participating, they turn out their porch light so children will know not to approach.
Of course there are those mischief makers that egg houses and cars, but most neighborhoods celebrate Halloween without incident. Even the adults get involved in the celebration with fog machines and costume parties.
![Reblog this post [with Zemanta]](http://img.zemanta.com/reblog_e.png?x-id=4b3f44db-8cfa-40da-acb9-ab91d8c57ffe)
Trick or treating goes back to the celebration of Samhain by the Celts on the British Isles. This pagan festival was one that celebrated nature and its gifts. The practitioners also believed that on that night the boundaries between the living and the dead were compromised and spirits could once again walk the earth.
In an effort to appease the spirits, people would leave offerings of food and drink on their doorsteps. These rituals were thought to protect their harvests for another year. This was also the time for a practice called “souling.”

Souling involved food in exchange for prayers. During the celebration, poor people would take to begging for food from neighbors. This food was granted in exchange for prayers by the receivers for the souls of dead family members.
As the tradition was passed down, the begging became food left for these poor individuals who would continue to pray for the dead. Eventually, children were sent from house to house to receive food or bits of money for the family.In some countries, the wearing of masks and receiving of gifts is still called “souling.” Small food items or money are still received by children.
Trick or treating is a thoroughly modern and American tradition.When it first started, trick or treating was just that. If a homeowner didn’t provide treats, the costumed person would perform some trick. This could be playing a prank on them or egging the house. In some countries, this is a part of the mischief of the spirits. Any spirit that didn’t receive food was also likely to do something to the person of the house.
Now, kids go from house to house, saying this phrase and receiving a ton of sweet treats. People travel from neighborhood to neighborhood for sweet fare. Tricks are more a part of the fun of the night than a slight against any one person. If a neighbor is not participating, they turn out their porch light so children will know not to approach.
Of course there are those mischief makers that egg houses and cars, but most neighborhoods celebrate Halloween without incident. Even the adults get involved in the celebration with fog machines and costume parties.
Saturday
4 Easy Fun Halloween Craft Ideas
Kids always have fun making crafts, especially holiday-themed crafts.
Here are some fun Halloween craft ideas for your kids to make this year.
1. Trick-or-Treat bucket
 Supplies:
ice cream bucket
construction paper
markers, crayons
glue
glitter
Directions:
Use construction paper to draw ghosts, pumpkins, scarecrows, etc. Cut out your decorations and glue them to the outside of an ice cream bucket.
2. Trick-or-Treat goody bags
Supplies:
small brown paper bags
Halloween stickers
markers
treats (candy, pencils, erasers, bubblegum, etc.)
Directions:
Decorate paper bags in Halloween themes using your art supplies. Put treats inside bags. Fold the top of the bag down and tape shut with a Halloween sticker.
3. Tiny pumpkins
Supplies:
acorns
orange paint
green paint
Directions:
Lay acorns on a sheet of newspaper. Paint the bottom of the acorns with orange paint. After the orange paint dries, paint the top of the acorns green (for the stem of the pumpkin). Allow to dry thoroughly.
4. Spooky Spiders
Supplies:
black construction paper
cotton balls or cotton stuffing
black pipe cleaners
small bowl or saucer
stapler
Directions:
Using black construction paper, trace around a small bowl or saucer. (Cut out two circles per spider.) Place stuffing or cotton balls on first circle. Lay second circle on top of cotton stuffing and staple half-way around. Insert 3-4” pipe cleaners on each side, then staple the second half of the circles together. Bend pipe cleaners to make the “legs” of the spider.
Here are some fun Halloween craft ideas for your kids to make this year.
1. Trick-or-Treat bucket
Supplies:ice cream bucket
construction paper
markers, crayons
glue
glitter
Directions:
Use construction paper to draw ghosts, pumpkins, scarecrows, etc. Cut out your decorations and glue them to the outside of an ice cream bucket.
2. Trick-or-Treat goody bags
Supplies:
small brown paper bags
Halloween stickers
markers
treats (candy, pencils, erasers, bubblegum, etc.)
Directions:
Decorate paper bags in Halloween themes using your art supplies. Put treats inside bags. Fold the top of the bag down and tape shut with a Halloween sticker.
3. Tiny pumpkins
Supplies:
acorns
orange paint
green paint
Directions:
Lay acorns on a sheet of newspaper. Paint the bottom of the acorns with orange paint. After the orange paint dries, paint the top of the acorns green (for the stem of the pumpkin). Allow to dry thoroughly.
4. Spooky Spiders
Supplies:
black construction paper
cotton balls or cotton stuffing
black pipe cleaners
small bowl or saucer
stapler
Directions:
Using black construction paper, trace around a small bowl or saucer. (Cut out two circles per spider.) Place stuffing or cotton balls on first circle. Lay second circle on top of cotton stuffing and staple half-way around. Insert 3-4” pipe cleaners on each side, then staple the second half of the circles together. Bend pipe cleaners to make the “legs” of the spider.
Tuesday
Easy Wormy Cupcakes - Halloween Recipe
 Ingredients:
Prepared Cupcakes
Frosting of choice
1 package gummy worms
1 package chocolate cookies or graham crackers
Directions:
Place a few cookies in a plastic bag and using the back of your hand or a rolling pin press down until mixture resembles fine breadcrumbs. Using a teaspoon make a small well in the center of each cupcake. Frost cupcakes around well and sprinkle with cookie crumb mixture. Stick a gummy worm into the center of each cupcake.
Sunday
Halloween Scavenger Hunt for Younger Kids
 A Halloween scavenger hunt is a fun activity that not only provides a chance for kids to get outside before the weather gets colder, but it can help them think creatively too. There are a few different ways to do a scavenger hunt. Depending on where you live, you can have different kinds of scavenger hunts. If the children are too young to go on their own, you can team them up with older children or adults or even have small teams.
Nature Scavenger Hunt – If you live in a rural area or have a park near by, you could have a nature scavenger hunt. Make a list of things readily available that are safe for the children to collect, such as a maple leaf (maybe of specific color), pine cones, different color rocks, acorns, etc. Give each child or team a list and a paper bag to collect their treasures. You could even hide some things in the area they will be searching such as mini pumpkins or pre-wrapped treats.
Decorations Scavenger Hunt – This will take a bit more planning; yet can be a lot of fun. Go around your neighborhood looking for interesting and unique decorations. Make note of the address, name of the family or possibly stores. Then give a list describing the decorations and the children have to find the location where the decorations reside and write it down. If they aren’t old enough to write, be sure your teams are split with older children or adults.
Costume Scavenger Hunt – Sometimes businesses, malls or plazas have a Trick or Treat time earlier in the day and have their employees dress in costumes. List several different costumes they might find and see who can find the most costumes on the list. They could have the person sign their paper when they find the different costumes.
Photo Scavenger Hunt – If you have enough adults with either Polaroid or digital cameras, you can have a photo scavenger hunt. This is a good alternative to having the children gather things, especially if you live in an urban area where there may not be many things the kids can collect legally. Once all the teams are back to the starting point, they can compare pictures to determine the winner. This also allows for people to find the same thing and have a more specific list of items. This can be done for more than one age group, by having more obvious clues for the younger children and more difficult ones for the older kids.
If the weather isn’t nice, you can have an indoor Halloween scavenger hunt and hide things around the house. Some rules will need to be given such as if a door is closed, that room doesn’t have any of the items in it. Give clues for the items they are looking for and a bag for collecting. Candy, apples, mini pumpkins, small toys and Halloween themed items are great for indoor scavenger hunts and lots of fun for the kids.
Recommended:
Little Kid Halloween Crafts
Easy Halloween Crafts
![Reblog this post [with Zemanta]](http://img.zemanta.com/reblog_e.png?x-id=9fe5d1b1-f1ab-40c6-9acc-71eb4576d80e)
Friday
Sweet Skeleton Bones - Halloween Recipe
 Ingredients:
4 large egg whites
2 cups icing sugar
Directions:
Preheat oven to 250F.
In a large bowl beat egg whites until stiff. Gradually start adding the sugar, one tablespoon at a time. Keep beating and adding sugar until you have a meringue. Line baking trays with paper. Using a piping bag with a plain nozzle pipe a straight meringue bone line (approximately 4 inches long). Pipe a meringue ball at the end of each bone. If necessary shape bones further using a small knife.
Bake for approximately 1 hour and 15 minutes or until bones have dried out. Remove from oven and let cool on paper.
Recommended:
New! Halloween Recipes Ebook. Over 50 Recipes With Photos.
Plus 3 Bonus Ebooks - Halloween Crafts, Halloween Drawing and Halloween Printable Games!
Monday
2 Quick and Easy Halloween Crafts
By James Watts
 Making Halloween crafts can really get you into a festive mood for this spooky holiday. Here are 2 fun and easy craft ideas:
Tin Can Lanterns
Did you know that you can easily create Halloween lanterns out of those old tin cans? Use cans that have a smooth surface to accurately display your designs. All you need to complete this Halloween crafts project are cans, a hammer, and a nail.
Use a nail to press very shallow points into the cans, designing Halloween images like, a jack-o-lanterns, skulls, cats, half-moons, and stars. If you don't want to do this free-hand, tape a drawing onto the can.
So, how to make the holes without denting the metal? The trick to this is to fill the can with water, and freeze it. Next, hammer simple designs into the can with a nail. One or two good taps should do it, depending on the size of the hole that you want.
When your cans are complete, place tea lights or votive candles inside to illuminate.
Spooky Bags
If you are hosting a Halloween party, or handing out candies to trick-or-treaters, decorate small bags to hold assorted treats, and surprises.
Here's what you'll need:
- scissors
- a glue stick
- brown paper bags with handles (5x8-inch, or smaller)
- several sheets of construction paper, in colors like, purple, green, yellow, orange, black, and white.
Draw simple shapes like, jack-o-lanterns, moons, stars, and witch's hats, on card board, and cut them out. Now, you have templates to work with. Trace these shapes onto your construction paper, cut them out, and attach them to the bags with a glue stick.
James writes for Ghoulish Halloween, a site that tries to entertain and inform. For more great Halloween articles, visit our Halloween articles archive.
Article Source: http://EzineArticles.com/?expert=James_Watts http://EzineArticles.com/?2-Quick-and-Easy-Halloween-Crafts&id=33907
Making Halloween crafts can really get you into a festive mood for this spooky holiday. Here are 2 fun and easy craft ideas:Tin Can Lanterns
Did you know that you can easily create Halloween lanterns out of those old tin cans? Use cans that have a smooth surface to accurately display your designs. All you need to complete this Halloween crafts project are cans, a hammer, and a nail.
Use a nail to press very shallow points into the cans, designing Halloween images like, a jack-o-lanterns, skulls, cats, half-moons, and stars. If you don't want to do this free-hand, tape a drawing onto the can.
So, how to make the holes without denting the metal? The trick to this is to fill the can with water, and freeze it. Next, hammer simple designs into the can with a nail. One or two good taps should do it, depending on the size of the hole that you want.
When your cans are complete, place tea lights or votive candles inside to illuminate.
Spooky Bags
If you are hosting a Halloween party, or handing out candies to trick-or-treaters, decorate small bags to hold assorted treats, and surprises.
Here's what you'll need:
- scissors
- a glue stick
- brown paper bags with handles (5x8-inch, or smaller)
- several sheets of construction paper, in colors like, purple, green, yellow, orange, black, and white.
Draw simple shapes like, jack-o-lanterns, moons, stars, and witch's hats, on card board, and cut them out. Now, you have templates to work with. Trace these shapes onto your construction paper, cut them out, and attach them to the bags with a glue stick.
James writes for Ghoulish Halloween, a site that tries to entertain and inform. For more great Halloween articles, visit our Halloween articles archive.
Article Source: http://EzineArticles.com/?expert=James_Watts http://EzineArticles.com/?2-Quick-and-Easy-Halloween-Crafts&id=33907
Friday
7 Fun Halloween Games for Kids
 Part of the fun of Halloween is playing silly games. When planning the games, it’s best to keep the costumes in mind and plan things that will work around them. Games should be simple with easy to follow rules.
Bobbing for Apples – A classic Halloween party game has always been bobbing for apples, however some kids don’t like putting their face in the water or don’t want to mess up the make up that took a long time to perfect. One variation of this game is to tie the stems of the apples to varied lengths of string and then hang them up. Then the people have to put their hands behind their back and try to take a bite out of the apple. You can also play the game using marshmallows.
Mummy Wrap Up – Divide guests into small groups. Provide them each with a roll or two of toilet paper and see who can use the tissue paper to wrap up one of their teammates the fastest. The first one to complete their mummy using the entire roll wins.
Jack-o-Lantern Faces – Hang a picture of a jack-o-lantern on the wall and have matching face pieces cut out of black paper for the eyes, nose and mouth. Place sticky-tack on the back of the pieces. Blindfold each player when it is their turn and play the same as pin the tail on the donkey except players put the eyes, nose and mouth on the pumpkin face. Younger children can do just the mouth, while older children and adults can do the entire face for more of a challenge.
Ghost Hunters – Cut out several paper ghosts and divide the players into two groups. Have one team hide the ghosts around the room. The other team has to hunt down the ghosts. Play continues until all ghosts are found. The team that hunts the most ghosts wins.
Ghost Bowling – Collect ten empty one or two liter soda pop bottles (use the larger bottles for younger guests). Paint the bottles white and decorate with silly ghost faces. Use a small playground size ball as the bowling ball. If you can find orange ones, decorating them as jack-o-lanterns can add to the fun.
Upset the Candy Dish – Place chairs in a circle, facing in, having one less than the number of players. Whisper in each child’s ear the name of a favorite Trick or Treat candy. They will become this piece of candy in the candy dish. Have one person stand in the middle of the circle to be “it”. The child in the middle will call one or two types of candy. If the candy name that’s called is matches the one the children are, they should stand up and try to move to another empty seat. Occasionally, the child who is “it” calls out, “Upset the candy dish.” and all the players need to move to a new seat. If any of the candy kids can’t find a seat they then become “it.”
Pirates’ Treasure – Fill two small buckets with sand and place inside a larger washtub or box. Bury treasure in the buckets such as small prizes or candy. Each player receives a plastic spoon to dig for their treasure. Divide players into two teams. Position players around their designated bucket and tell them when to start. They dig in their treasure “chests” until every piece is found. The first team to find all their treasure wins.
Recommended:
![Reblog this post [with Zemanta]](http://img.zemanta.com/reblog_e.png?x-id=1697a80c-10f9-45fa-8566-7aba1e559405)
Wednesday
7 Tips for Telling Spooky Halloween Stories
 Campers seem to love them. Passing on spooky stories while the embers burn bright on a cool fall night is something we look forward to with excitement. Storytelling has also been the most popular way to pass on folklore down through the ages.
Storytelling on Halloween can be also be entertaining and fun for many children. Movies are okay, but when the details are left to the kids imagination, the story takes on a new life. Here are some tips to get everyone scared stiff with your story this Halloween.
1. Choose an appropriate venue. If you own a fire pit, let the storytelling begin outside. Cooler weather may mean you have to provide some blankets but that adds to the atmosphere. Inside the house, choose a quiet location big enough for everyone to sit in a circle. Instead of a fire, use a battery operated lantern or candle.2. Turn off the lights. You can’t tell a good ghost story with the lights on. Outdoors, wait until the sun is completely down to start your tale.
3. Know the story. It can be read from a book or spoken from memory but get it right. A botched ghost story is like mangling a good joke by revealing the punch line. A good storyteller practices his craft so that his listeners won’t be disappointed.
4. Have an accomplice. Someone has to emphasize your high points with some creative theatrics. The theatrical help doesn’t need to be loud or overstated. A few noises or whispers that could be the wind or the trash can falling over are perfect to make the story more real.
5. Dress the part. No one will be frightened by someone in Bermuda shorts and a polo shirt. A dark cloak, some makeup, and a few well hidden props add to your fierceness. Some storytellers use a flashlight under their chin as the only source of light. This is a classic trick, but more light allows for listeners to catch a glimpse of your tricks as they unfold.
6. Choose a story that mixes fact with fiction. If you want to get people to believe you, adding a bit of fact will get the listeners thinking about the validity of the story. Also, choosing a story situation that could come true will put your story over the top.
7. Choose stories that are age appropriate. If you have really young children, then a really scary or spooky story may not be a good idea.
Here are a few suggestions:
Childrens Halloween Stories Ages 4-8
Childrens Halloween Stories Ages 9-12
Do you have a flare for the dramatic? If you do, consider telling a spooky story during Halloween this year.
![Reblog this post [with Zemanta]](http://img.zemanta.com/reblog_e.png?x-id=c70e718b-1ffb-48a2-8713-9b428b489d8c)
Tuesday
The Great Pumpkin: Fact or Fiction?
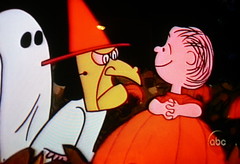 Image by debaird via FlickrWe have heard of the Tooth Fairy, the Easter Bunny, and Santa Claus, but what about the Great Pumpkin? The only one rumored to have seen him has no corroborating witness to validate the claim. Does he really exist?
This issue needs to be resolved once and for all. It started with Charles Schultz and a little boy named Linus, but it has taken on a life of its own. Now, all kids want to know the origins of the Great Pumpkin.
According to Linus, the Great Pumpkin visits all of the pumpkin patches around the world. He appears to the one who has the best pumpkin patch in his opinion. The kids waiting for him will receive candy and treats for their efforts.
First of all, kids don’t grow pumpkins. They may have started off by planting the seeds, but most of the day to day work is done by the adults. So, why do the kids get all the fun?
The Great Pumpkin was thought up by Peanuts creator Charles Schultz. One of his most memorable characters, Linus Van Pelt, tries to convince all of his friends that they should wait in a creepy old pumpkin patch instead of going door to door for their treats.
Of course, they ignore him except for Charlie Brown’s sister, Sally. She is so love-struck that she can’t see the pumpkin poo for the starts in her eyes. But, even she has her limits. Year after year, she is left with no candy and itchy arms from spending the night in the pumpkin patch. I wonder if her parents knew where she was.
Many parents have endeavored to solve their kid’s curiosity with a little Great Pumpkin action of their own. Instead of waking up to the horror that their kids have snuck off to sit in a pumpkin patch all night, they have used the Great Pumpkin idea to start their own holiday traditions.
Kids who donate part of their candy haul for a good cause will get a visit from the Great Pumpkin. He will take the donated candy and leave a toy or some cash in its place. Hey, no one can eat all that candy and they get good stuff out of the deal.
There are other ways for the Great Pumpkin to manifest himself during the fall months. Maybe the Great Pumpkin

Saturday
Halloween Themed Party Foods

Here are a few simple ideas:
Rice Cereal Halloween Treats
The regular, run of the mill rice cereal treat can be turned into a sweet and unique Halloween treat by adding a few drops of orange food coloring (or a combination of red and yellow) into the marshmallow/butter mixture as it melts. When you cut the treats into squares, add one candy corn to the top of each square.
Marshmallow Haystacks
Here's a great variation to the rice cereal treat recipe. Replace the rice cereal with corn flake cereal. Follow the instructions combining the cereal, melted marshmallow and butter mixture. Mold the cereal mixture into the shape of haystacks. Add an orange candy corn pumpkin to the top of each haystack.
Candy Corn Ice Cream Sundae
Into one cup of partially thawed vanilla ice cream, mix in one tablespoon of candy corn (coarsely chopped) and one tablespoon of dry roasted peanuts (coarsely chopped). Scoop into ice cream bowl. Freeze until firm. When ready to serve, drizzle caramel ice cream topping over the ice cream mixture, a dollop of whipped cream and some additional candy corn and peanuts.
Halloween Napoleons
Thaw one sheet of frozen puffed pastry. Divide the puff pastry into three equal sections and bake according to package directions. Crush enough Oreo cookies to make 1-½ cups. Set aside.
Prepare one package of vanilla pudding only add a few drops of orange (or combination of red and yellow) food coloring. Set pudding aside. Whip one small carton of whipping cream until stiff. While whipping, add two teaspoons vanilla and one teaspoon sugar.
To build the napoleon, lay one sheet of baked puff pastry on serving tray. Spread ½ of the pudding mixture on the puff pastry. Sprinkle 1/3 of the crushed cookies on top of the pudding. Spoon dollops of whipped cream on top of the cookies and follow by a second layer of puff pastry. Continue layering pudding, cookies and whipped cream.
Once the third and last layer of puff pastry is set on top, spoon three small dollops of whipped cream (do not spread) and top with some additional crushed Oreos. Slice and serve.
A Fun Halloween Breakfast
Breakfast is many times an overlooked meal when celebrating the holidays. The simple addition of orange food coloring (or a combination of red and yellow) into a glass of milk will give your kids a surprise on Halloween morning.
For some spooktacular Halloween pancakes, melt ¼ cup of chocolate chips in a microwave safe container. When melting chocolate, melt at 30-second intervals and stir each time. Pour or spoon melted chocolate into a heavy-duty plastic zip top bag. Press all the chocolate into one corner of the bag and with a scissor, cut a tiny corner off the edge of the bag. Make pancakes and with the melted chocolate, pipe a jack-o-lantern face on the pancakes.
Recommended:
New! Halloween Recipes Ebook. Over 50 Recipes With Photos.
Plus 3 Bonus Ebooks - Halloween Crafts, Halloween Drawing and Halloween Printable Games!
Subscribe to:
Posts (Atom)
