Showing posts with label Halloween Activities. Show all posts

Tuesday

Useful Tips to Keep Halloween Fun, Easy and Safe for Toddlers

Toddlers can bring a certain element of innocence into the mix when celebrating Halloween. With a toddler, trick or treating or parties can become tiring, so it may not be possible for you to go out like you normally would. Toddlers can be naive and get scared very easily so safety is always an issue with them.

With that in mind, you can still enjoy Halloween with these tips to keep your toddler safe and happy. 

*  Avoid Scary Costumes 

Children and especially toddlers can be prone to night frights. Many toddlers find it difficult, if not impossible, to separate reality from the "monsters" that they may see walking around. When dressing up, go easy on the make-up and keep the costume simple so that your child knows that it is you behind the costume.

Sunday

Harvest Party vs. Halloween Trick or Treating

Many parents, for varied reasons, are getting out of the traditional Halloween spirit of trick or treating. To replace the door to door trick or treating or Halloween parties, parents are instead choosing Harvest or Fall parties. These are basically a watered down version of the traditional Halloween.

Many of today’s parents who are Christians themselves placed Christmas as their favorite holiday as a child. Many of those same parents chose Halloween as one of their favorite holidays as a child too. Back then, they had no idea that Halloween could be a huge offense to Christians. Just as the Christian holiday of Christmas can be an offense to the non-believer. 

In the 1970’s and 1980’s there were reports of razor blades and needles being put into apples being handed out to trick or treating children. Around the same time there were reports that candy and taffy were being laced with poison.

Friday

Great Alternatives to Halloween Candy

If you’re a parent you may be worrying about how much candy your child will be bringing home this Halloween. Candy not only has very little nutritional value, it is bad for your teeth and can cause nasty tummy aches when eaten in excess. If you’re looking for something different to hand out to trick-or-treaters this year, here are some great alternative ideas.

Nabisco has 100 calorie pack individual packages that trick-or-treaters will find enjoyable to their palates. Teddy Grahams and chocolate covered pretzels are my two favorites, but they have a whole line to choose from.

Individual packages of nuts or trail mixes are nutritionally beneficial to your ghosts and goblins. They not only taste good but they are good for you too.

Microwave popcorn packages are a great option. You can buy them in many different flavors, but if you’re looking for healthier alternatives skip the extra or movie butter kind.

Nabisco Handi-Snack offers a variety of healthy choices. A few examples that I particularly like are:

Breadsticks and cheese
Cheese dunk ‘ems
Ritz cheese and crackers

These individual packages are a tasty choice. Fairly inexpensive, they are a great fit for children.

While not quite as healthy as some of the other options above, many restaurants, such as McDonald’s and Wendy’s, sell coupon certificates or books you can substitute with. You can purchase gift certificates for your trick-or-treaters and by using your Arch card and following some simple guidelines at the McDonald’s website you can not only give a non candy gift, you can also earn college rewards.

Non-Edible Gifts

If you visit a dollar store or a store that sells children’s books inexpensively, you can find non-edible gifts too. Items such as coloring books, crayons or audio books and more are great alternatives to sugar laden candy. Not only is this a healthier choice, it is educational as well. Some people even shop throughout the year to help spread the cost out.

A visit to your local dentist may be just what the doctor orders this Halloween. He may be able and willing to give you toothbrushes and toothpaste samples at a reduced rate to hand out to children. If you wanted you could even hand out sugarless gum.

Small games like jacks and jump rope fit well into a trick-or-treater’s bag and will last for longer than one night. While various different flash cards or games such as old maid and crazy eights are not what trick-or-treaters are used to getting at Halloween it is something they can use and re-use. Again, they are inexpensive and can be purchased throughout the year at dollar or general stores.

The choice is yours. Use some of these ideas to begin to change the suggestion that candy is the only choice for Halloween. Be creative and give your visitors something healthier this year!


Reblog this post [with Zemanta]

Halloween Fun for Children...Riddles, Quotes, Word Game and Poem

The time is upon us. The weather is starting to get chillier, the leaves are falling, school has started and that can only mean one thing: Halloween is around the corner! This time of year is all spooking a few friends, stocking up with goodies on the big night and having fun. So, here are some ideas to help your children (and you) have a great time this Halloween. Have fun!


Halloween Riddles for All Ages

1. What did Dr. Spook give the witch who had a sore throat?
Answer: Coffin Drops

2. What do Ghost’s wear when their eye sight is failing?
Answer: Spookicles

3. How do you make a witch stew?
Answer: Make her wait!

4. What do lady ghosts put on their skin?
Answer: Vanishing lotion

5. What do you get when you cross a witch with an iceberg?
Answer: A cold spell

6. How do bats learn to fly?
Answer: They take batting lessons.

7. If you worked in a mortuary, what would you call your free time?
Answer: Coffin Break

8. Why do skeletons always catch a cold?
Answer: the get chilled to the bone.

9. What is a vampire's favorite fruit?
Answer: Necktarines


Tombstone Quotes to Make You Giggle

Bonnie Parker (Bonnie and Clyde): “As the flowers are all made sweeter by the sunshine and the dew, so this old world is made brighter by the lives of folks like you.”

Tombstone Arizona: “Here lies Lester Moore; Four slugs from a .44; No Les No More."

Pennsylvania Tombstone, US: “Here lies the body of Jonathan Blake. Stepped on the gas instead of the brake.”

England Tombstone: “The children of Israel wanted bread and the Lord sent them manna. Old Clerk Wallace wanted a wife…and the Devil sent him Anna.”

Massachusetts Tombstone: “Under the sod and under the trees, lies the body of Jonathan Pease. He is not here, there’s only the pod. Pease shelled out and went to God.”

Dentists’ Tombstone: “John Brown is filling his last cavity.” 

Can you come up with more funny or spooky tombstone ideas?


Who Can Make the Most Words?

On a piece of paper write the words “Trick or Treat”. See who can make the most words using only the letters found in the phrase.

Possible Answers: (There may be more, but here are quite a bit to get you started): rock, ate, tick, tack, race, oat, are, rate, crate, car, rack, trace, tart, tort, crater, racer, rice, track, or, tea, tire, ace, ice, ore, tore, rico, roar, kite, tear


Here’s a Halloween poem kids will love:

Witches and Goblins and Ghosts, OH NO
By Sheilah Warner Blackledge 

Out on a night called Halloween
I’m dressed like a dog and my mom’s a queen
The sounds of ghosts make me turn green
I think I’ll run, but instead I scream
The witch over there behind those trees
Put me and mama on our knees
A goblin grabbed me by the arm
It was my friend Jo who meant me no harm
Oh my, oh why do I want to go?
To hear witches and goblins and ghosts, OH NO!

Tuesday

5 Steps to Carving Your First Halloween Pumpkin

So you’re ready to carve your first Halloween pumpkin? Congratulations in joining the ranks of many who rank pumpkin carving as one of their favorite Halloween activities.

To avoid a huge mess you’ll have to clean up later, the first thing you’ll need to do is prepare your workspace.

Choosing Your Pumpkin Carving Space
Select a flat work area. Lay down several layers of newspaper being sure to overlap them.

Gather Your Supplies
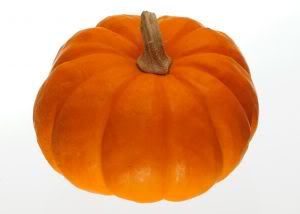
Pumpkin
Pumpkin Carving Kit or Butcher Knife & Serrated Paring Knife
Semi-Permanent Marker or Pencil
Container lined with a garbage bag to deposit your waste
Lighting Source of Your Choice (Candle, glow sticks, etc.)
Step 1:  Preparing Your Pumpkin for Carving
Turn your pumpkin on its side. Using your permanent marker, draw a large circle on the bottom of the pumpkin. Be sure it’s large enough to fit a large spoon and your hand inside. By cutting out the bottom (instead of the top) you’ll make it easier to place your light source in it. Using your large butcher knife carefully cut out the circle. Make note of the best side for carving your chosen design or face.

Step 2:  Let the Fun Begin
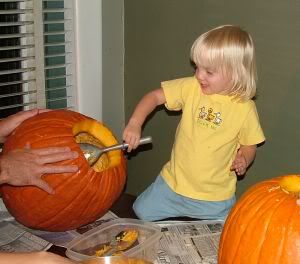
It’s time to clean out your pumpkin. Using your hands, scoop out the seeds and put them in the garbage bag, unless you want to put them in a bowl for later roasting. Using either a wooden spatula or serving spoon, scrape out the meat. Hopefully you have already decided on which side you will be carving the face, as this will need extra removal of the flesh.

Step 3:  Draw Your Design
After the pumpkin has been cleaned out, it is time to draw the design of your choice. Use a semi-permanent marker or a pencil and draw your design on the pumpkin.
If you don’t have an artistic mind it’s ok. You can use a stencil available on several Internet sites or one that may have came in your tool kit. (http://www.hersheys.com is a good site for designs.) Take a copy of the design and place it over the pumpkin. Secure this with masking tape. With a needle, push pin or nail, start poking small holes through the paper and into the pumpkin. Make sure you do them close enough as this is the pattern from which you will carve.

Step 4:  It’s Finally Time to Carve
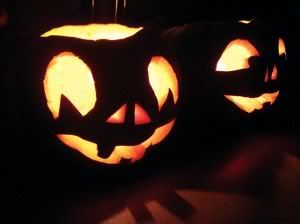
Preparation pays off. Now, let’s get carving this pumpkin. Be particular in your carving as any little slip with the knife is likely to ruin your design and may cause injury. With your paring knife or other preferred choice of carving tool, carve along the pattern lines cutting all the way through the rind. Cut away from yourself and into the pumpkin. After each feature has been cut out slowly push out the cut pieces from inside the pumpkin.
Hint: Keep your blades as sharp as possible to ensure accuracy and ease of carving.

Step 5:  Clean Up
Take your newspaper and fold it over on all sides, keeping your pumpkin “gunk” on the inside. Once folded, throw it in the trash can or garbage bag.
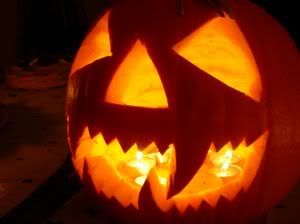
Congratulations! You’ve now carved your first pumpkin.
Once you’ve finished and cleaned up the mess, place that baby out on the front porch and add your lighting. Show it off for the entire neighborhood to see. Don’t forget to take a picture too – after all you only have a first carved pumpkin once. Enjoy!

Recommended Product:
(affiliate link)

Enhanced by Zemanta

Saturday

7 Tips for Trick or Treating Safety

Going out into the ghoulish night to troll for candy is not as innocent as it seems. It should be, but it is not. Parents and children alike want to enjoy their bit of frightful fun without real dangers lurking around every corner. Here are some safety tips to accomplish that task.
A greeting card / postcard about Hallowe'enImage via Wikipedia

1.  Begin trick or treating during the daylight. It used to be that everyone waited until dark for greater effect. Unfortunately, there are those who want to cause trouble and can only do so after dark. Now, trick or treating begins at dusk even if the sun is not down.

2.  For smaller children, drive instead of walk. The concept is the same as far as kids are concerned. Their friends will still see their costume and they still receive candy. As the night wears on it may get cold and little feet get tired quite quickly. A car means a faster exit when everyone is too tired to go on.

3.  Check the candy before letting any is eaten. It is a safety precaution that protects the kids. Not everyone is out to harm children but there have been incidents in the past where blades and pins were found in candy.

4.  Stick together. Never let a child go trick or treating alone. If you can’t do it, entrust your child’s care to another adult friend. Let them walk a few feet ahead to feel independent but not so far that they are out of your sight.

5.  Choose costumes that fit properly. Wherever possible, use homemade costumes or non-toxic paint to replace store bought masks. Most masks are too hot and don’t provide an adequate visual field. Kids who can’t see where they are going can trip and fall.

6.  Refrain from taking homemade candy and treats. Even schools don’t accept homemade food items anymore. It is too easy to get sick and the liability is high. Homemade candy apples look scrumptious, but there is no list of ingredients to tell you what was used to create them. Stick to prepackaged candy for children to eat.

7.  Use a cloth shopping bag to hold the candy. Plastic bags can buckle under the weight of the haul and your child could lose their loot on the front step or in the street. Plastic pumpkins don’t hold as much candy and the strap can break with the same results as a plastic bag.

Trick or treating is a fun Halloween night tradition designed to scare us silly. In the process, don’t forget to take precautions so everyone is safe.
Reblog this post [with Zemanta]

Thursday

Trick or Treat!

Many of us have uttered those words or ones like them since we were old enough to wear a costume. Some say cute little rhymes at each house they visit. But, what is the origin of our current candy grabbing tradition on Halloween?

Trick or treating goes back to the celebration of Samhain by the Celts on the British Isles. This pagan festival was one that celebrated nature and its gifts. The practitioners also believed that on that night the boundaries between the living and the dead were compromised and spirits could once again walk the earth.

Advertisement for Bach's candiesImage via Wikipedia
In an effort to appease the spirits, people would leave offerings of food and drink on their doorsteps.  These rituals were thought to protect their harvests for another year. This was also the time for a practice called “souling.”

Souling involved food in exchange for prayers. During the celebration, poor people would take to begging for food from neighbors. This food was granted in exchange for prayers by the receivers for the souls of dead family members.

As the tradition was passed down, the begging became food left for these poor individuals who would continue to pray for the dead. Eventually, children were sent from house to house to receive food or bits of money for the family.In some countries, the wearing of masks and receiving of gifts is still called “souling.” Small food items or money are still received by children.

Trick or treating is a thoroughly modern and American tradition.When it first started, trick or treating was just that. If a homeowner didn’t provide treats, the costumed person would perform some trick. This could be playing a prank on them or egging the house. In some countries, this is a part of the mischief of the spirits. Any spirit that didn’t receive food was also likely to do something to the person of the house.

Now, kids go from house to house, saying this phrase and receiving a ton of sweet treats. People travel from neighborhood to neighborhood for sweet fare. Tricks are more a part of the fun of the night than a slight against any one person. If a neighbor is not participating, they turn out their porch light so children will know not to approach.

Of course there are those mischief makers that egg houses and cars, but most neighborhoods celebrate Halloween without incident. Even the adults get involved in the celebration with fog machines and costume parties.


Reblog this post [with Zemanta]

Friday

7 Fun Halloween Games for Kids

Part of the fun of Halloween is playing silly games. When planning the games, it’s best to keep the costumes in mind and plan things that will work around them. Games should be simple with easy to follow rules.

Bobbing for Apples – A classic Halloween party game has always been bobbing for apples, however some kids don’t like putting their face in the water or don’t want to mess up the make up that took a long time to perfect. One variation of this game is to tie the stems of the apples to varied lengths of string and then hang them up. Then the people have to put their hands behind their back and try to take a bite out of the apple. You can also play the game using marshmallows.


Mummy Wrap Up – Divide guests into small groups. Provide them each with a roll or two of toilet paper and see who can use the tissue paper to wrap up one of their teammates the fastest. The first one to complete their mummy using the entire roll wins.


Jack-o-Lantern Faces – Hang a picture of a jack-o-lantern on the wall and have matching face pieces cut out of black paper for the eyes, nose and mouth. Place sticky-tack on the back of the pieces. Blindfold each player when it is their turn and play the same as pin the tail on the donkey except players put the eyes, nose and mouth on the pumpkin face. Younger children can do just the mouth, while older children and adults can do the entire face for more of a challenge.


Ghost Hunters – Cut out several paper ghosts and divide the players into two groups. Have one team hide the ghosts around the room. The other team has to hunt down the ghosts. Play continues until all ghosts are found. The team that hunts the most ghosts wins.


Ghost Bowling – Collect ten empty one or two liter soda pop bottles (use the larger bottles for younger guests). Paint the bottles white and decorate with silly ghost faces. Use a small playground size ball as the bowling ball. If you can find orange ones, decorating them as jack-o-lanterns can add to the fun.


Upset the Candy Dish – Place chairs in a circle, facing in, having one less than the number of players. Whisper in each child’s ear the name of a favorite Trick or Treat candy. They will become this piece of candy in the candy dish. Have one person stand in the middle of the circle to be “it”. The child in the middle will call one or two types of candy. If the candy name that’s called is matches the one the children are, they should stand up and try to move to another empty seat. Occasionally, the child who is “it” calls out, “Upset the candy dish.” and all the players need to move to a new seat. If any of the candy kids can’t find a seat they then become “it.”


Pirates’ Treasure – Fill two small buckets with sand and place inside a larger washtub or box. Bury treasure in the buckets such as small prizes or candy. Each player receives a plastic spoon to dig for their treasure. Divide players into two teams. Position players around their designated bucket and tell them when to start. They dig in their treasure “chests” until every piece is found. The first team to find all their treasure wins.


Recommended:

Little Kid Halloween Crafts

Easy Halloween Crafts

Over 90 Homemade Costumes Ideas and Instructions

Reblog this post [with Zemanta]

Wednesday

7 Tips for Telling Spooky Halloween Stories

Campers seem to love them. Passing on spooky stories while the embers burn bright on a cool fall night is something we look forward to with excitement. Storytelling has also been the most popular way to pass on folklore down through the ages.

Storytelling on Halloween can be also be entertaining and fun for many children. Movies are okay, but when the details are left to the kids imagination, the story takes on a new life. Here are some tips to get everyone scared stiff with your story this Halloween.

1. Choose an appropriate venue. If you own a fire pit, let the storytelling begin outside. Cooler weather may mean you have to provide some blankets but that adds to the atmosphere. Inside the house, choose a quiet location big enough for everyone to sit in a circle. Instead of a fire, use a battery operated lantern or candle.

2.
Turn off the lights. You can’t tell a good ghost story with the lights on. Outdoors, wait until the sun is completely down to start your tale.

3.
Know the story. It can be read from a book or spoken from memory but get it right. A botched ghost story is like mangling a good joke by revealing the punch line. A good storyteller practices his craft so that his listeners won’t be disappointed.

4.
Have an accomplice. Someone has to emphasize your high points with some creative theatrics. The theatrical help doesn’t need to be loud or overstated. A few noises or whispers that could be the wind or the trash can falling over are perfect to make the story more real.

5.
Dress the part. No one will be frightened by someone in Bermuda shorts and a polo shirt. A dark cloak, some makeup, and a few well hidden props add to your fierceness. Some storytellers use a flashlight under their chin as the only source of light. This is a classic trick, but more light allows for listeners to catch a glimpse of your tricks as they unfold.

6.
Choose a story that mixes fact with fiction. If you want to get people to believe you, adding a bit of fact will get the listeners thinking about the validity of the story. Also, choosing a story situation that could come true will put your story over the top.

7. Choose stories that are age appropriate. If you have really young children, then a really scary or spooky story may not be a good idea.

Here are a few suggestions:

Childrens Halloween Stories Ages 4-8

Childrens Halloween Stories Ages 9-12


Do you have a flare for the dramatic? If you do, consider telling a spooky story during Halloween this year.
Reblog this post [with Zemanta]

Tuesday

Homemade Paper Mache Halloween Masks

By: Susanne Myers
Do you need a fun mask for your child to go with a great costume? Or maybe you want to start with a mask and build the rest of the costume around it. You and your child can have a lot of fun making a paper mache mask from scratch.
You’ll need just a few things to make just about any mask you can imagine. Those items include balloons, newspaper, wallpaper glue and some acrylic paint. A pair of sharp scissors comes in handy to cut out eyes and mouth. Wear old clothing, or put an apron on both you and your child. Making the mask can get a bit messy.

Cover your work area in plenty of newspaper to protect it from glue and paint. Next, cut several newspapers into strips. Blow up a balloon so it is slightly larger than your child’s head. Now dip a newspaper strip completely in the glue and stick it on the balloon. Continue doing this back and forth until you have the entire balloon covered in several layers of newspaper. Work out any wrinkles as you go along. The more layers of newspaper you have, the sturdier the mask will be.
Finally add any features specific to the mask you are making. For example, if you are making a frog mask, sculpt two ball shapes at the top of the mask that you can later paint as eyes. If you are making a cat, dog, or monkey mask, form the snout and of course don’t forget about ears. The only limit is your imagination.

Allow the mask to dry completely, preferably over night. Once it is completely hardened, start cutting into the mask to pop the balloon. Cut a large enough opening so your child can get his or her head inside the mask, then cut eye and mouth openings. For younger children, you may prefer to cut the back of the mask out completely, and, instead, wrap a piece of ribbon or yarn around the back of the head to secure the mask to allow better air-passage.

Paint the mask in a solid color and allow it to dry completely. Then add details like eyes, nose and lips in different colors. Once that coat of paint is completely dry, it is ready to wear. For a longer lasting and shiny mask, cover the mask in several layers of hodge podge before using it.

Author Resource -> Would you like to quickly make creative Halloween costumes that you and your children will be proud of -- for a fraction of the price of store-bought? Susanne Myers has co-authored a book to show you how -- no sewing involved. Visit ILoveHalloweenCostumes.com to learn more.

Article From FreeAffiliateArticles.com

Monday

Tips for Fun-Filled Trick-or-Treating For Your Kids

by Halloween Costumes

What’s a child’s favorite part of Halloween? Going trick-or-treating, of course. What could be more fun than dressing up, and then walking from door to door collecting plenty of candy along the way? Best of all, this fun tradition takes place at night. Make this the most fun trick-or-treating experience for your child with these simple tips.

Location, Location, Location -
Pick a good neighborhood with plenty of people who are prepared for and welcome trick-or-treaters. If you are new in the area, talk to other parents in your neighborhood about where to go trick-or-treating. Usually neighborhoods or subdivisions that decorate a lot are a good choice as well.

Chaperone -
You may be tempted to send older children out on their own to Trick-or-Treat, but unless you know everyone on the street they are walking on, and have them go in a group, it’s just not a safe option. Instead, send at least one adult along with them. Having an adult will make sure the trick-or-treating stays a fun experience for your children.

Trick-or-Treat in a Group -

Kids have even more fun trick-or-treating if they get to run around in a group. Get a few families in the neighborhood together, or ask the cousins over to go trick-or-treating with you and your kids. Just make sure you bring several adults, especially if the kids are young, to keep up with everyone.

Don’t Overdo It -
Start early, right at or even before dusk and don’t overdo the trick-or-treating. How long you end up trick-or-treating will of course depend on the age of your children. Just keep an eye on how they are doing and take them home when they start getting tired. The whole evening will be more memorable if you end it on a good note.

Would you like to quickly make creative Halloween costumes that you and your children will be proud of -- for a fraction of the price of store-bought? Susanne Myers has co-authored a book to show you how -- no sewing involved. Visit ILoveHalloweenCostumes.com
to learn more.

Article Source: http://www.freeaffiliatearticles.com/directory

Thursday

Halloween Group Activities - Part 2


Whether it’s a class party, Girl Scout meeting, youth group gathering or just with friends, finding activities that will engage the entire group without long wait times can be a challenge.

Try some of these activities at your next group Halloween celebration.

Crafts

Pumpkin Painting –
By using the tiny, little mini-pumpkins (gourds), newspaper and a little craft paint, kids can create their own Halloween masterpiece.

Cover the table with newspaper. Wash and dry each mini-pumpkin. Using a marker or pen, have each child draw a simple face or design on the pumpkin (or use a stencil or pumpkin painting pattern).

With small paintbrushes, the child can then paint their pumpkin design. After allowing the pumpkins to dry, a light coating of spray sealer will seal the design and keep the paint from peeling off.

Face Painting –
Face Painting is always a big hit with children of all ages. And it’s not as difficult as it sounds. You don’t have to be an artist to face paint.

There are two ways to conduct a face painting activity at a youth gathering. One is to have an adult who is prepared with a few popular face painting designs to paint a unique design on each child.

The other way is to allow the children to paint each other. There is no telling what kinds of creations kids will come up with when they are given a paintbrush and face paints.

The key with Face Painting is to use the authentic face paints. Do not attempt to use craft paints as face paints. It’s not safe for use on skin.

Popular Halloween cheek art designs include pumpkins (obviously!), ghosts, candy corn, goblins, cats and witches.

Quiet Activities

Sometimes during a Halloween party with large groups, it is necessary for the children to do an activity that requires them to be seated and relatively quiet.

Some simple ideas for the children to do while the snacks are being prepared, for example, include Halloween crossword puzzles, Halloween seek-and-finds or Halloween word maker (writing as many words as you can using the letters in “Halloween” or “Jack-O-Lantern”).

Movement

One of the most fun activities that a group can participate in at a Halloween party is Freeze Dancing. An adult operates a portable CD player containing a Halloween song CD. The children dance to the music until the music stops. At that point, each child has to freeze in the position they were in when the music stopped. Anyone who moves even a little is eliminated from the next round. The last child standing wins.

Using these ideas for Group Halloween Parties, your party is sure to be a success.

Halloween Group Activities - Part 1


The month of October brings class parties, Boy and Girl Scout get-togethers, community gatherings, hayrides, Fall Festivals and Halloween celebrations.

Where kids gather to celebrate Halloween, parents and leaders frantically search for unique, fun and creative activities that can be done in a group setting.

Here are some ideas for Halloween Group Activities to get your creative juices flowing.

Games

“Pin The Face On The Great Pumpkin” – Cut a large pumpkin shape from orange poster board. Cut three triangle shapes from black construction paper as well as a jack-o-lantern type mouth from the black construction paper. Place on piece of double sided tape on each triangle and mouth shape.

Blindfold the child, spin them around three times and allow them to place the facial features on the great pumpkin.

An alternative to this for younger kids is to simply cut a stem shape from green construction paper and allow the children to “Pin The Stem On The Great Pumpkin.” For this game, tape the facial features to the pumpkin before the game begins.

“Guess The Ghost” – This is a great activity for a classroom party where there are many activities happening at the same time. Using one white sheet, a parent or teacher randomly (and discreetly) selects one student and takes them to the hallway to put the sheet over him or her. The parent brings the student back into the room and the remaining children must guess who the ghost is.

To really stump the children, occasionally place the sheet over the principal, school nurse, librarian or other fun loving individual.

“Bobbing For Apples” – Cut a large apple shape from red construction paper. Place it on the floor. Place a paperclip on a number of stickers, “no homework” coupons or other lightweight objects. Scatter the paper clipped items all around the apple. Tie a string to a stick and at the end of the string tie a small magnet.

The object of the game is to “bob for apples,” or touch the magnet to a paperclip. Whatever the child picks up with the magnet is theirs to keep.

“Halloween Treat Ring Toss” - Again, cut a large pumpkin shape from orange poster board. Place it on the ground and scatter candies and small items (i.e. eight pack of crayons, play-doh, fruit snacks, etc.) all around the pumpkin.

Using diving rings or another type of ring (even doughnuts if you really want to be silly), the child tosses the rings and gets to keep the items that are inside of the ring.
Related Posts with Thumbnails