To avoid a huge mess you’ll have to clean up later, the first thing you’ll need to do is prepare your workspace.
Choosing Your Pumpkin Carving Space
Select a flat work area. Lay down several layers of newspaper being sure to overlap them.
Gather Your Supplies
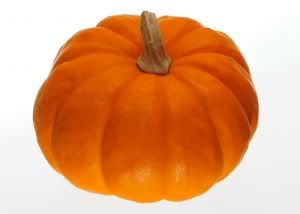 Pumpkin
Pumpkin Carving Kit or Butcher Knife & Serrated Paring Knife
Semi-Permanent Marker or Pencil
Container lined with a garbage bag to deposit your waste
Lighting Source of Your Choice (Candle, glow sticks, etc.)
Step 1: Preparing Your Pumpkin for Carving
Turn your pumpkin on its side. Using your permanent marker, draw a large circle on the bottom of the pumpkin. Be sure it’s large enough to fit a large spoon and your hand inside. By cutting out the bottom (instead of the top) you’ll make it easier to place your light source in it. Using your large butcher knife carefully cut out the circle. Make note of the best side for carving your chosen design or face.
Step 2: Let the Fun Begin
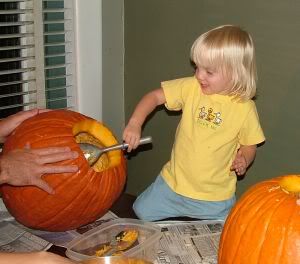 It’s time to clean out your pumpkin. Using your hands, scoop out the seeds and put them in the garbage bag, unless you want to put them in a bowl for later roasting. Using either a wooden spatula or serving spoon, scrape out the meat. Hopefully you have already decided on which side you will be carving the face, as this will need extra removal of the flesh.
 Step 3: Draw Your Design
After the pumpkin has been cleaned out, it is time to draw the design of your choice. Use a semi-permanent marker or a pencil and draw your design on the pumpkin.
If you don’t have an artistic mind it’s ok. You can use a stencil available on several Internet sites or one that may have came in your tool kit. (http://www.hersheys.com is a good site for designs.) Take a copy of the design and place it over the pumpkin. Secure this with masking tape. With a needle, push pin or nail, start poking small holes through the paper and into the pumpkin. Make sure you do them close enough as this is the pattern from which you will carve.
Step 4: It’s Finally Time to Carve
 Preparation pays off. Now, let’s get carving this pumpkin. Be particular in your carving as any little slip with the knife is likely to ruin your design and may cause injury. With your paring knife or other preferred choice of carving tool, carve along the pattern lines cutting all the way through the rind. Cut away from yourself and into the pumpkin. After each feature has been cut out slowly push out the cut pieces from inside the pumpkin.
 Hint: Keep your blades as sharp as possible to ensure accuracy and ease of carving.
Step 5: Clean Up
Take your newspaper and fold it over on all sides, keeping your pumpkin “gunk” on the inside. Once folded, throw it in the trash can or garbage bag.
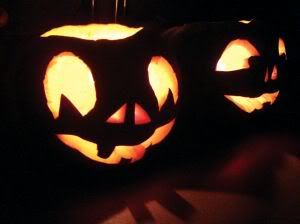
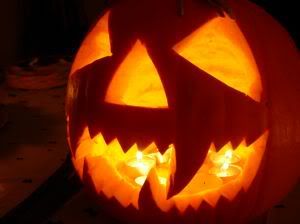 Congratulations! You’ve now carved your first pumpkin.
Once you’ve finished and cleaned up the mess, place that baby out on the front porch and add your lighting. Show it off for the entire neighborhood to see. Don’t forget to take a picture too – after all you only have a first carved pumpkin once. Enjoy!
Recommended Product:
(affiliate link)


WOW... This looks so good! Did you really made these pumpkins? They look so professionally made. ***Thumbs up***
ReplyDeleteThanks for visiting Jessica!
ReplyDeleteNo, we did not carve those pumpkins. They are from a packet of Halloween photos that I have.
I have some photos of the pumpkins we carved last year and we are getting ready to carve a couple for this year. I will post them as soon as I can.
Great tip EJ on cutting out the bottom instead of the top.I have had many a burnt finger from placing the candle in through the top.
ReplyDeleteThanks
Steve
Hello EJ,
ReplyDeleteIt's a pleasure to visit your blog.
I am sure that your pumpkins are even better then those on the photos, can't wait to see the result.
I was wandering if I could link to your post on my blog? I wanted to write about Halloween for a long time now and couldn't find anything appropriate to write about.
Please let me know...
Regards,
Jess
This is the best halloween pumpkin ever!!! Thanks
ReplyDelete